
Painting your basement floor not only enhances its appearance but also adds a layer of protection against moisture, dust, and wear. With the right products and a systematic approach, you can achieve a smooth, long-lasting finish. In this guide, we walk you through the step-by-step process to paint a concrete basement floor, featuring high-performance waterproof paints and coatings from Aoyalis.
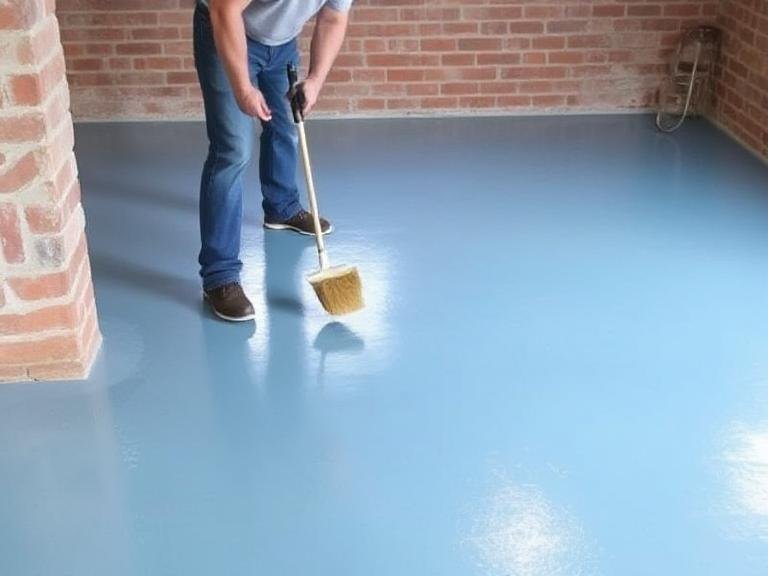
Table of Contents
- 1. Why Paint a Concrete Basement Floor?
- 2. Tools and Materials You’ll Need
- 3. Surface Preparation Steps
- 4. Repairing Cracks and Holes
- 5. Applying a Moisture Barrier or Waterproof Coating
- 6. How to Paint a Concrete Basement Floor
- 7. Drying and Curing Times
- 8. Maintenance Tips for Painted Basement Floors
- 9. Aoyalis: Waterproof Paints and Coatings Supplier
- 10. Summary Table
- 11. References
1. Why Paint a Concrete Basement Floor?
Unfinished concrete floors can be dull, porous, and prone to absorbing moisture. By painting the floor, you achieve several benefits:
- Improved Appearance: Adds color, brightness, and style to the space.
- Moisture Resistance: Prevents dampness, mold, and mildew buildup.
- Durability: Increases resistance to abrasion and chemical spills.
- Dust Control: Seals the concrete surface to reduce dust.
2. Tools and Materials You’ll Need
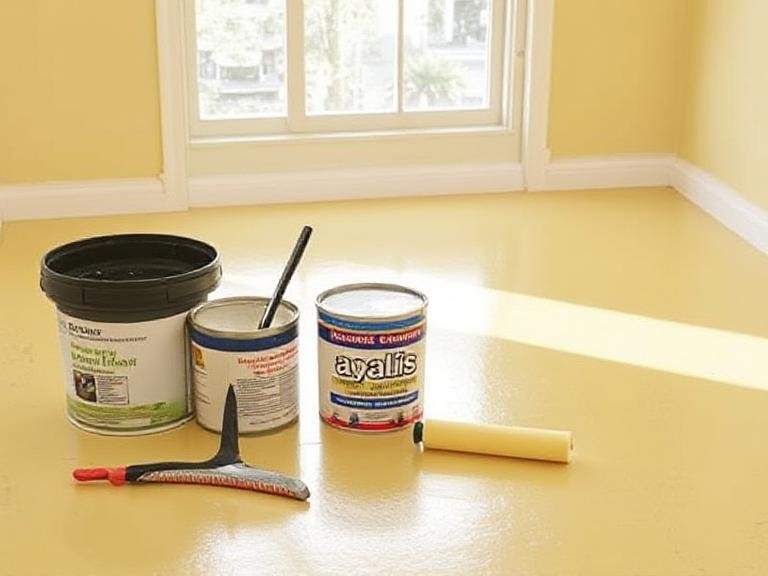
Before beginning, gather the following items for a successful basement floor painting project:
- Concrete cleaner or degreaser
- Concrete etcher (optional, for smooth floors)
- Crack filler or patching compound
- Aoyalis Waterproof Coating or Paint
- Paint rollers (with extension pole)
- Paint trays and liners
- Wire brush and stiff broom
- Vacuum or shop vac
- Protective gear (gloves, mask, goggles)
- Painter’s tape and plastic sheeting
3. Surface Preparation Steps
Proper preparation is critical for ensuring paint adhesion and a long-lasting result. Here’s how to prep your concrete floor:
Step 1: Clear the Space
- Remove all furniture, tools, and storage items.
- Clean the floor with a broom or vacuum.
Step 2: Clean the Surface
- Use a concrete degreaser or cleaner to eliminate oil, grease, and grime.
- Rinse thoroughly and let dry completely.
Step 3: Etch the Surface (Optional)
- If the concrete is very smooth, apply a concrete etching solution to create texture.
- This helps paint adhere better.
4. Repairing Cracks and Holes
Painting over damaged concrete is a waste of time. All defects should be addressed before coating:
- Use a concrete crack filler to seal narrow cracks.
- For larger holes or pitting, apply a patching compound and smooth it with a trowel.
- Allow to cure for at least 24 hours before moving forward.
5. Applying a Moisture Barrier or Waterproof Coating
Basement floors often suffer from moisture seepage. Applying a waterproof layer ensures paint longevity:
- Choose a high-quality waterproofing solution like those offered by Aoyalis.
- Roll or brush on the waterproofing agent and let it cure for the manufacturer’s recommended time (typically 24–48 hours).
- This also acts as a primer for the final paint layer.
6. How to Paint a Concrete Basement Floor
With a clean, repaired, and sealed surface, you’re now ready to paint:
Step 1: Select the Right Paint
- Use epoxy-based or acrylic-based waterproof floor paint.
- Aoyalis waterproof paints are engineered for concrete substrates.
Step 2: Apply the First Coat
- Use a roller to apply the paint evenly across the floor.
- Start in a corner and work your way out of the room.
- Allow it to dry completely (usually 12–24 hours).
Step 3: Apply a Second Coat
- A second coat enhances durability and uniform coverage.
- Follow the same process and allow ample drying time.
7. Drying and Curing Times
- Dry to Touch: 12–24 hours after final coat.
- Light Foot Traffic: After 48 hours.
- Heavy Use or Furniture Placement: Wait at least 7 days for full curing.
Tip: Maintain proper ventilation and room temperature during the drying process for best results.
8. Maintenance Tips for Painted Basement Floors
To maximize the lifespan of your new floor:
- Clean regularly with a soft broom or mop.
- Avoid harsh chemicals that can erode paint over time.
- Use floor mats in high-traffic areas.
- Reapply a topcoat every few years as needed.
9. Aoyalis: Waterproof Paints and Coatings Supplier

Aoyalis is a trusted manufacturer of waterproofing materials and paints for residential, commercial, and industrial use. Their products are formulated to withstand extreme environments while being safe and eco-friendly.
- Factory Size: 2,000㎡ with advanced production lines
- Product Categories: Waterproofing Materials, Coatings, Agents, and Paints
- Applications: Basements, bathrooms, rooftops, stone surfaces, and more
- R&D Capabilities: In-house development team ensures innovation and performance
Using Aoyalis waterproof paints ensures your basement floor remains durable, clean, and resistant to moisture for years to come.
10. Summary Table
| Step | Description | Recommended Product |
|---|---|---|
| 1. Clear & Clean | Remove all items and clean debris and stains | Concrete degreaser |
| 2. Etch Surface | Etch smooth concrete for better paint adhesion | Concrete etching solution |
| 3. Repair Cracks | Fill cracks and holes using concrete filler | Patching compound |
| 4. Apply Waterproof Layer | Seal against moisture seepage | Aoyalis Waterproof Coating |
| 5. Paint the Floor | Apply two coats of waterproof paint | Aoyalis Waterproof Paint |
| 6. Cure & Maintain | Allow proper drying, then clean and recoat as needed | Mild cleaner, topcoat sealant |